
Cooking at night, trying to read a recipe, and your own hand's shadow obscures what you're chopping. Your ceiling light illuminates the ceiling — not your countertop. Almost everyone faces this problem in their kitchen. Yet, the solution has been around for a long time: wireless under cabinet kitchen lighting.
This guide covers everything you need to know before buying: the 3 available solutions, an honest cost analysis between professional installation and DIY, the technical criteria that truly matter, and common mistakes to avoid. Whether you're a renter, homeowner, or simply allergic to DIY projects, you'll leave with a clear decision.
Why Under Cabinet Lighting Is a Game-Changer for Your Kitchen
Ceiling-mounted lighting inevitably creates shadowed areas on countertops, especially when you're standing in front of them. It's basic physics: your body blocks the light. The solution isn't to crank up your ceiling light's brightness; it's to bring the light source closer to your workspace — by placing it under your upper cabinets.
What Are the Tangible Benefits of Under Cabinet Lighting?
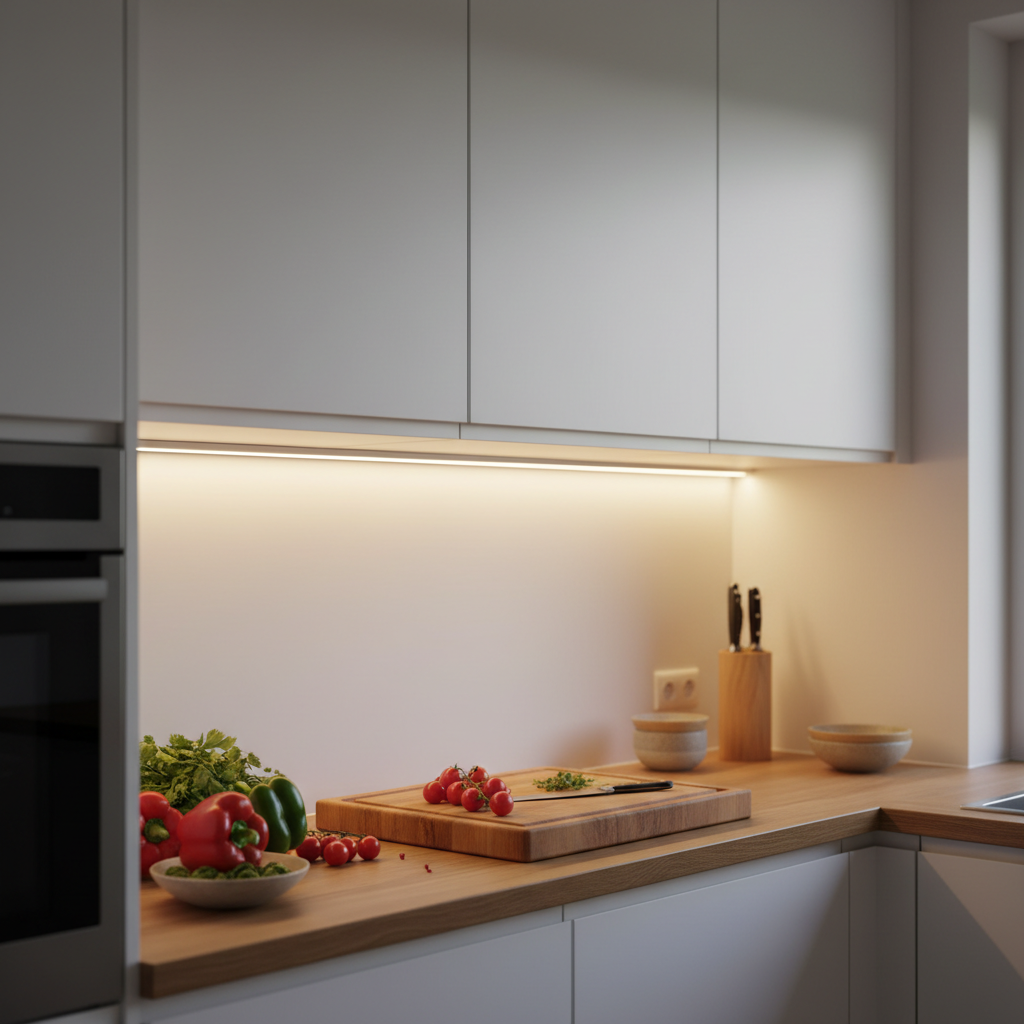
Well-placed under cabinet lighting directly illuminates your work surface, eliminating shadows. You see what you're doing better, work more comfortably, and your kitchen's ambiance completely transforms — even during the day. It's often the only lighting modification that has an immediate, visible impact.
Users notice the difference from the first use: slicing vegetables, reading ingredient labels, preparing a meal in the evening with soft light — everything becomes simpler. It's a small change with a significant daily effect.
Why Choose Wireless Over Wired?
Wired solutions require opening cabinets, running cables, sometimes adding a new outlet or modifying your electrical panel. In short: an electrician, several hours of work, and a bill that can range from $150 to $300 depending on the service provider — not including materials.
Wireless solutions install in under a minute. You stick on a mount, attach the light bar, and you're done. No visible cables, no drilling, no contractors. For renters, this is especially appealing: zero traces when you move out, security deposit intact. For busy homeowners, it's the same logic: immediate results, zero hassle.
If you're still weighing your options, our complete wireless vs. wired comparison details the pros and cons of each approach based on your needs.
Top 3 Types of Wireless Under Cabinet Kitchen Lighting
Not all wireless solutions are created equal. Here are the 3 options actually available on the market, with their strengths and limitations.
Option 1: Rechargeable LED Light Bar (The Most Practical)
This is the most advanced solution. An LED light bar powered by an internal USB-rechargeable battery, with an integrated motion sensor and magnetic or adhesive mounting. It turns on when you approach, turns off automatically, and you recharge it every few weeks depending on your usage.
This option best combines practicality, battery life, and light output. The motion sensor prevents energy waste: the light only turns on when someone is present, significantly extending battery life in standby mode.
Key point on battery: mAh capacity makes all the difference in your experience. Below 1,500 mAh, you'll be recharging weekly or every 10 days — which quickly becomes annoying. Above 3,000 mAh, you can easily go a month without thinking about it. This is where the difference between a useful purchase and a gadget truly lies.
Option 2: Battery-Powered LED Strip Light
Some LED strip lights are powered by a battery pack. The advantage: they conform to shapes, can be cut, and adapt to complex angles. The limitation: battery life is often very short (a few continuous hours), light output varies depending on strip quality, and adhesive-only mounting isn't always reliable long-term under a cabinet exposed to heat or humidity.
This option is suitable for occasional or decorative use, but rarely as daily functional lighting for a countertop.
Option 3: Battery-Powered Puck Lights
Clip-on or stick-on puck lights, powered by AAA or AA batteries. Easy to install, often very inexpensive. But batteries drain quickly (sometimes in a few weeks with regular use), replacing them becomes repetitive and costly, and the light output is rarely satisfactory for a kitchen countertop.
Best reserved for emergencies or rarely used spaces (back of a cabinet, storage room). Not suitable for daily kitchen use.
The Cost Analysis Nobody Does Before Calling an Electrician
Many people think wired under cabinet lighting is the serious solution, and wireless is a DIY hack. In practice, the calculation is reversed.
What a Wired Installation Really Costs
An electrician to install wired LED light bars under kitchen cabinets includes: travel, labor (expect 1 to 3 hours depending on configuration), materials (conduits, outlets, cables, light bars), and sometimes panel modifications if a circuit doesn't exist. The realistic range is between $150 and $300 for a standard kitchen.
Add to that: electrician availability (often several weeks' wait), mandatory presence during work, and the inability to move everything if you relocate or renovate.
What a Rechargeable Light Bar Really Offers
Installation in under a minute. No cables, no drilling. You stick it, you mount it, it works. If you move, you take it with you — no way you're leaving behind $200 worth of equipment fixed to the wall like with a wired installation.
For renters especially, this is a massive advantage: no traces, no holes, no deductions from your security deposit. The rechargeable light bar travels with you.
To delve deeper into lifespan and long-term reliability, our article on the lifespan of rechargeable LED lighting answers questions you might have before investing.
Crucial Criteria for Making the Right Choice
With dozens of models available, here are the criteria that truly make a difference daily — not just marketing hype.
Battery Capacity: The #1 Criterion
We've mentioned it, but it bears repeating: battery capacity in mAh determines how often you recharge. It's like a car's fuel tank. A small tank means weekly gas station visits. A large tank means peace of mind.
The practical dividing line is around 1,500 mAh. Below that: very regular use likely means weekly recharging. Above 3,000 mAh: you're looking at a realistic month of battery life in motion detection mode (where the light only turns on when someone passes by).
Length and Light Output
You don't need a giant light bar for a small countertop. But if your countertop is 60 inches or longer, a single short light bar won't suffice. Length dictates light coverage and the number of lumens delivered.
For an active prep area (chopping, daily cooking), aim for sufficient light output to work without eye strain. For a coffee nook or secondary space, lower intensity is fine.
Color Temperature
Often overlooked during purchase, yet it significantly impacts ambiance and visual comfort:
- 3000K (Warm White): Warm light, similar to a classic incandescent bulb. Pleasant in the evening, less precise for technical tasks.
- 4000K (Neutral White): The best compromise for an active kitchen. Natural light, true to food colors.
- 6000K (Cool White): Very bright, crisp light. Good visual precision, but can be tiring or cold depending on the kitchen's ambiance.
If you can choose between all three at will, even better: you adapt it to the time of day and use.
Mounting System
In a kitchen, mounting faces real constraints: slight vibrations, steam, regular cleaning. The two wireless systems that work well are magnetic mounting (you attach, you detach, effortlessly) and industrial adhesive (more permanent, but very reliable on smooth kitchen cabinet surfaces).
Avoid solutions with flimsy magnets or low-quality adhesive: a light bar falling into a hot pan or onto a countertop ends badly.
Motion Sensor and Its Real Utility
A well-designed motion sensor means a light that turns on when you arrive and off when you leave — without you having to think about it. Over time, this prevents forgetting to turn it off, saves battery, and frees you from manual action.
Some models pair the motion sensor with an ambient light sensor: the light bar won't turn on if the room is already well-lit, for example, on a sunny day. This is smarter and further extends battery life.
| Criterion | Minimum Acceptable | Comfort Level |
|---|---|---|
| Battery Capacity | 1,500 mAh | 3,000 mAh and + |
| Length | 8 inches (20 cm) (narrow space) | 16 inches (40 cm) (countertop) |
| Temperature | 1 fixed option | 3 adjustable temperatures |
| Mounting | Simple adhesive | Magnetic + adhesive |
| Motion Sensor | Basic (presence only) | Motion + ambient light |
| Recharging | Standard USB | USB (without removing light bar if possible) |
Installation: What to Expect
The main advantage of wireless under cabinet kitchen lighting is its installation simplicity. Here's how it works in practice.
Step 1: Clean the Mounting Surface
Before sticking anything, the surface under the cabinet must be clean, dry, and degreased. Kitchen grease tends to accumulate under cabinets — even if you don't see it. A quick wipe with a damp cloth and a little detergent, let it dry for two minutes, and the surface is ready.
This step is often skipped. It determines whether your adhesive lasts six months or two weeks. Don't neglect it.
Step 2: Position the Mount Before Sticking
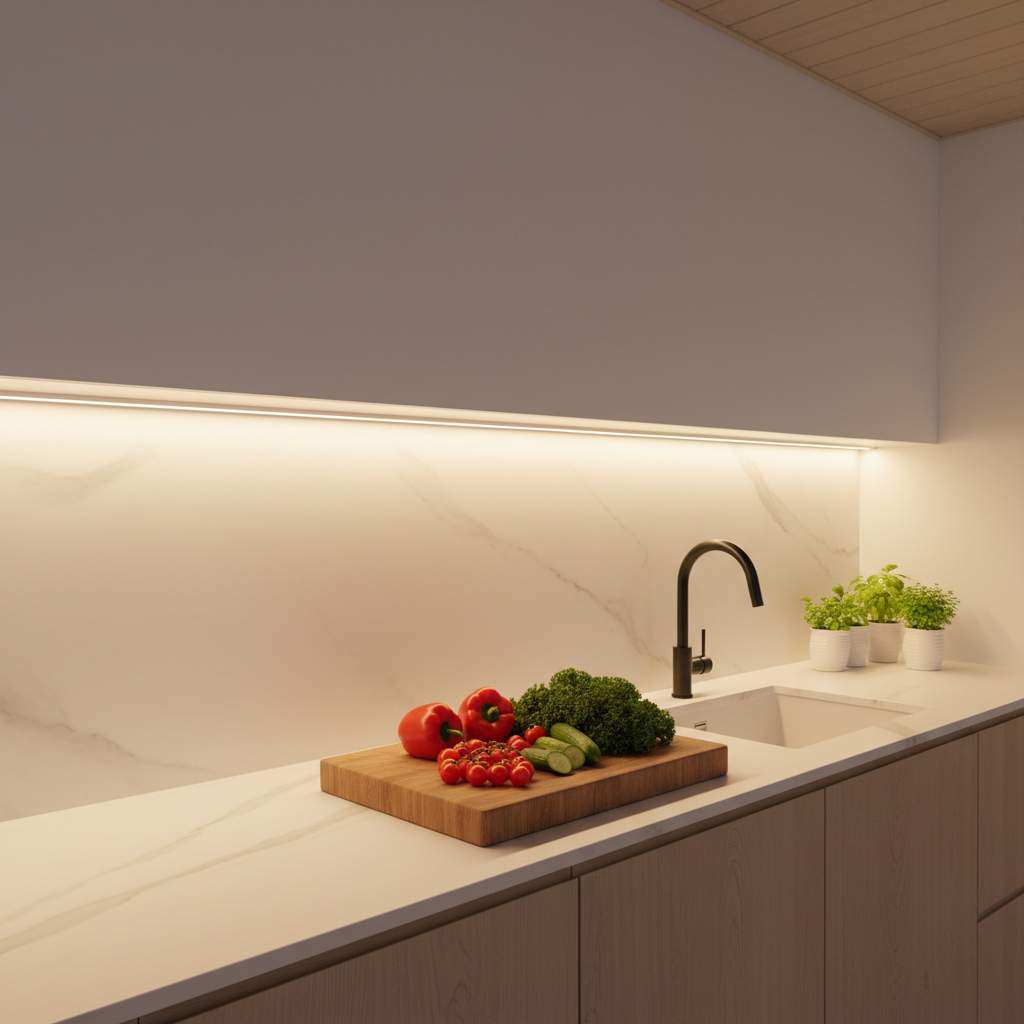
Before removing the protective film from the adhesive, manually position the mount to check the angle and coverage. If your light bar is 16 inches (40 cm) long, place it in the center of the countertop you want to illuminate — not at the edge of the cabinet.
Look from below: the light bar should not be visible from normal kitchen traffic areas. It illuminates downwards, not into your eyes.
Step 3: Stick the Mount and Attach the Light Bar
Remove the adhesive film, press firmly for 30 seconds across the entire mount. Ideally, let it sit for a few hours before attaching the light bar for maximum adhesion — some industrial adhesives reach full strength after a few hours.
Then, the light bar clips or magnetically attaches to the mount. It's in place, it's functional.
Step 4: Configure the Sensor and Temperature
Adjust the sensor sensitivity if the model allows. In a kitchen, 6-10 feet (2-3 meters) detection is often sufficient — no need for the light bar to turn on every time someone walks by in an adjacent hallway.
Choose your color temperature based on the desired ambiance. In the evening, 3000K is often more pleasant. For cooking during the day, 4000K provides truer color rendering.
For more on installation and countertop lighting options, our dedicated guide to wireless countertop lighting covers the most common scenarios.
What Renters Need to Know
The renter question deserves its own section, as this is often where people mistakenly get stuck.
A rechargeable LED light bar with magnetic mounting on an adhesive base is designed to be removed without a trace. Industrial adhesive mounts can be cleanly removed with a cutting wire (included in most kits) or a little heat. No holes in the wood or laminate of the cabinet. No electrical modifications. UL listed.
When you move, you detach the light bar (magnetic, it removes in one second), remove the mount, and take everything with you. Your next apartment will have the same lighting, installed on day one, without asking anyone's permission.
This is where the electrician cost argument makes perfect sense for a renter: spending $150 to $300 to install wired lighting in an apartment you'll leave in 2 years is literally a losing investment. The lighting stays in the kitchen. You leave.
Lumic's Movement 3.0: Why It Stands Out
Without excessive advertising, here's why the Movement 3.0 is often mentioned when looking for a serious wireless LED light bar for the kitchen.
Its 3,000 mAh battery is 3 times larger than most entry-level alternatives. In motion detection mode, this translates to about 4 weeks of battery life for the 9-inch (23 cm) model (approx. 150 lumens), and 5 to 6 weeks for the 16-inch (40 cm) model (approx. 320 lumens). You recharge about once a month, via USB — no batteries to buy.
It offers 3 color temperatures (3000K, 4000K, 6000K) and adjustable brightness. The aluminum casing is robust, mounting is magnetic with industrial adhesive, and it operates in motion detection or continuous mode as needed.
It comes with a 5-year warranty and a 90-day satisfaction guarantee. Customer support is responsive, with answers within 24 hours according to Lumic. On Trustpilot, the brand boasts 4.5/5 stars from over 2,200 reviews.
For a comprehensive comparison of available rechargeable options, our article on how to choose the best rechargeable LED light bar details the criteria to consider based on your usage.
Common Mistakes to Avoid
Here are some common pitfalls we frequently see when people choose their wireless under cabinet kitchen lighting:
- Buying without checking battery capacity: The cheapest model often has very poor battery life. The annoyance of recharging weekly quickly erases initial satisfaction.
- Choosing too short a length: An 8-inch (20 cm) light bar under a 32-inch (80 cm) countertop covers only a fraction of the surface. Evaluate the useful length before buying.
- Sticking without degreasing the surface: Adhesive won't stick to grease. The light bar eventually falls. Two minutes of cleaning prevents this problem.
- Mispositioning the sensor: An overly sensitive sensor activates for nothing (a cat, movement across the room). A poorly oriented sensor won't detect. Take time to adjust the range.
- Forgetting continuous mode for long uses: If you cook for 45 minutes, a sensor set to a 30-second timeout will cut the light regularly. Switch to continuous mode for longer sessions.
In Summary: How to Choose Your Wireless Under Cabinet Kitchen Lighting
Wireless under cabinet kitchen lighting is a mature, practical solution, often far more economical than a wired installation when you factor in the true cost of labor.
Here's what to remember to make the right choice:
- Absolute priority on battery: aim for at least 3,000 mAh for daily, hassle-free use.
- Choose the right length for the area to be lit — a short light bar on a large countertop won't work.
- Magnetic mounting is the most practical for daily use, especially for recharging.
- 3 adjustable temperatures are a real plus for adapting the ambiance to the moment.
- If you're a renter, wireless lighting is the only truly logical option: zero traces, you take it with you.
Want to dig deeper before deciding? Our article on the 7 benefits of wireless LED light bars or the one on wired or rechargeable kitchen LED light bars provide useful comparison points to refine your choice.