You have a path leading to your front door, garage, or the back of your yard — and as soon as night falls, it's pitch black. You fumble, search for your keys, and narrowly avoid tripping over the stone border. Yet, properly lighting an outdoor path isn't complicated. It's just a matter of having the right system, correctly positioned.
This guide gives you a practical approach: how to mark the path, how to light the destination, and how to do it without digging a trench across your lawn.
Two Distinct Needs for Outdoor Path Lighting
Before buying any lamp, understand one thing: outdoor path lighting serves two very different purposes.
Marking the Path: Guiding Your Steps
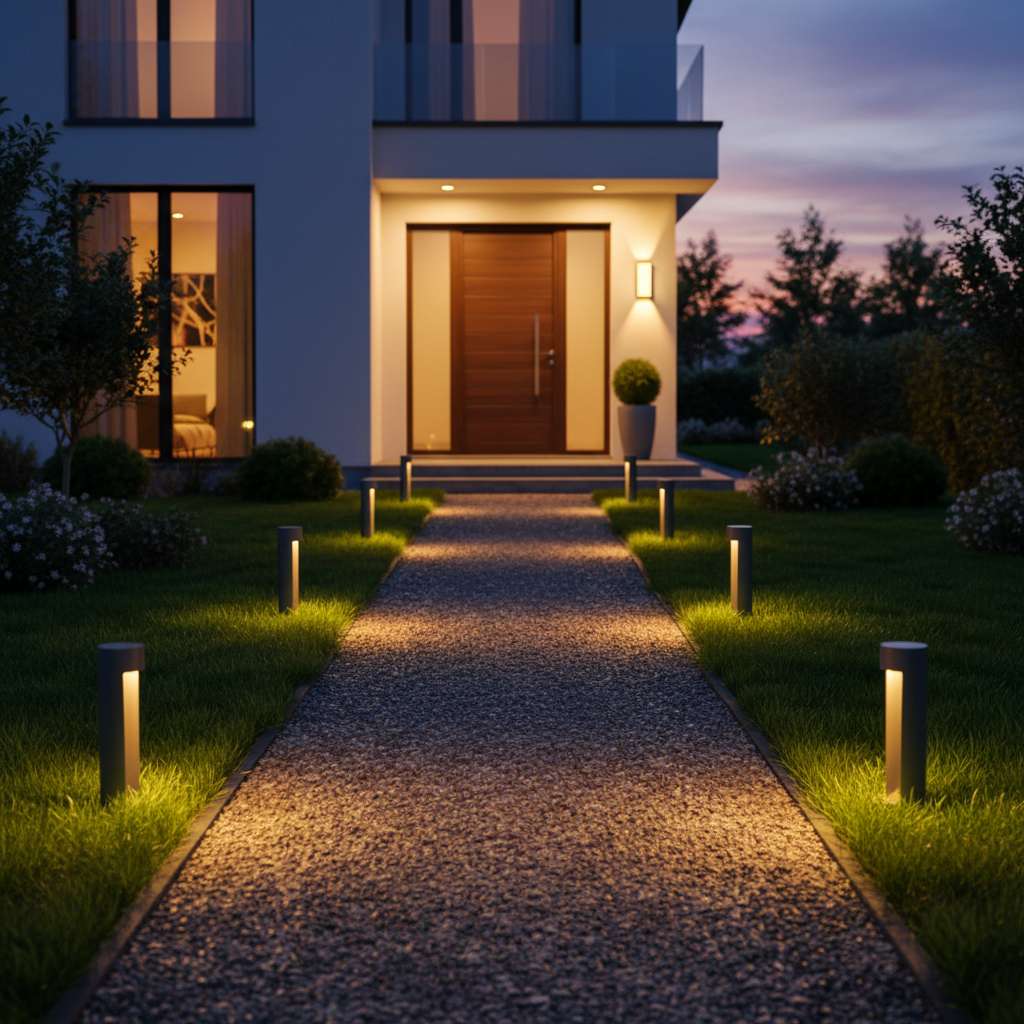
Path marking means indicating where the path is. Not necessarily lighting it up like broad daylight — just showing the boundaries, edges, and direction. For this, garden bollards are the classic solution. Placed every 6.5 to 10 feet (2 to 3 meters) on each side of the pathway, they create a discreet and effective double luminous line.
This isn't task lighting. It's guidance lighting. Moderate intensity is sufficient — and intentionally so: too much light on the ground can dazzle rather than help.
Lighting the Destination: The Arrival Zone
Where you really need light is at the end. In front of the entrance door, at the garage entrance, or at the end of the trail. This is where you look for keys, unload groceries, or greet someone. You need clear, bright light, triggered automatically — that's the role of a motion sensor.
The logic is simple: bollards guide your steps, the motion sensor lights your destination. These two functions complement each other, and confusing them is the most common mistake.
Path Bollards: Choosing the Right Configuration
Bollards for outdoor pathway lighting come in several categories. Here's what you need to know to make a good choice.
What Height Bollard for a Garden Path?
For a garden path, a bollard between 16 and 24 inches (40 and 60 cm) high is ideal. Too low, it only illuminates the immediate ground and becomes invisible beyond 3 feet (1 meter). Too high, it turns into a streetlamp — and the visual effect is ruined.
The intermediate height illuminates a ground cone of about 3 to 5 feet (1 to 1.5 meters) in diameter, which is exactly what you need to mark a pathway 3 to 5 feet (1 to 1.5 meters) wide.
Spacing Between Bollards: The 6.5-10 Feet Rule
Effective garden path lighting requires a bollard approximately every 6.5 to 10 feet (2 to 3 meters). Below 6.5 feet, it's visually cluttered. Beyond 10 feet, there can be dark areas between the bollards.
For a 33-foot (10-meter) path, plan for 4 to 5 bollards on each side — totaling 8 to 10 bollards. This is the budget to anticipate if you want clean and consistent marking.
Solar or Wired for Pathway Bollards?
This is the central question, and it deserves an honest answer. Here's a comparison table:
| Criterion | Solar Bollard | Wired Bollard |
|---|---|---|
| Installation | No cables, 5-min setup | Trenching required (20-30 inches / 50-80 cm deep) |
| Installation Cost | Zero (easy DIY) | Can reach $1,000 to $3,000 with an electrician |
| Lawn Damage | None | Trench along the entire pathway length |
| Light Consistency | Varies with weather | Constant regardless of season |
| Maintenance | Clean panel 1x/year | Almost none |
| Winter Autonomy | May decrease (less sun) | Not applicable |
| Repositioning Freedom | Total | None after installation |
The truth: wired bollards offer more consistent brightness. During a cloudy winter for several weeks, a solar bollard might dim. This is a fact, and it needs to be stated clearly. But for the vast majority of uses — marking a path for a few hours in the evening — solar is largely sufficient and avoids costly and destructive work.
If you're a renter, don't want to disturb your lawn, or if your path isn't immediately near an outdoor electrical outlet, solar is the way to go. To delve deeper into this choice, check out our article on solar bollards for marking your pathway.
Arrival Lighting: The Key Role of the Motion Sensor
A well-marked path is good. But if you arrive at your door in total darkness, the path marking is no longer very useful. Arrival lighting — in front of the door, at the garage entrance, at the gate — must be powerful and automatic.
Why a Motion Sensor Rather Than Permanent Light?
A permanent outdoor light all night means unnecessary consumption, faster wear and tear on the light, and often a nuisance for neighbors or for you when you look out the window. A motion sensor activates lighting only when someone approaches — which is exactly the right compromise between security and energy saving.
To understand everything about this technology, our article on how motion detectors for lighting really work goes deeper into range, angles, and settings.
What Light Output is Needed at the End of a Path?
At the end of a path or in front of an entrance door, we're talking about real lumens sufficient to illuminate an action area. You want to clearly see the lock, recognize a face, or put down groceries without tripping. You need bright, clear light — not decorative, but functional.
A solar lamp with a motion sensor like Lumic's SolarGlow delivers 1,200 lumens with two 180° motion sensors and a range of about 26 feet (8 meters). This is the type of power suitable for an entrance or the end of an outdoor trail. UL listed IP65, it resists rain, snow, and frost — which outdoor lighting must withstand without exception.
Should You Plan for Separate Path Lighting AND a Motion Sensor?
Yes, in most cases. The two have distinct functions. Bollards mark continuously or turn on at dusk. The motion sensor at the arrival activates only upon approach. It's not the same logic, and trying to do everything with a single device often results in an unsatisfactory compromise for both functions.
IP Rating: Why IP65 is the Minimum
For outdoor trail lighting or a garden path bollard, the IP rating (protection against solid intrusions and water) is a non-negotiable criterion.
IP65 means:
- 6: Total protection against dust (maximum rating)
- 5: Resistance to water jets from all directions
This is the minimum for outdoor use exposed to rain. An IP44 bollard (splash protection) might suffice under an awning, but on an open path that receives direct rain, a poorly protected bollard will eventually fail within a few months. Always check the technical specifications before buying.
Installing Your Path Lighting Without Trenching: A Practical Example
Digging a trench along a path for wired lighting is a serious operation. You need to go 20-30 inches (50-80 cm) deep to protect cables, plan for conduit, power from the electrical panel, and often call an electrician. The cost can easily reach $1,000 to $3,000 depending on the path length and house configuration — not to mention the damage to the lawn, which will take several seasons to recover properly.
Solar directly addresses this problem. Zero trenching, zero cables, zero electrician. Each bollard is autonomous — you stake it, and it works. Wireless outdoor lighting solutions have clearly evolved in recent years, and quality solar is no longer anything like the cheap lamps that died after two hours.
How to Install Solar Path Bollards Yourself?
Installation is truly simple:
- Determine the desired spacing (6.5-10 feet between each bollard)
- Mark the locations on the ground before starting
- Drive the stake of each bollard into the ground (most include a screwing or driving system)
- Orient the solar panel south, slightly tilted towards the sky
- Activate the bollard and let it charge for a full day before first use
Fifteen minutes for a 33-foot (10-meter) path with 8 bollards. That's realistic.
Where to Place the Motion Sensor Lamp at the End of the Path?
Mount it high — ideally between 6.5 and 10 feet (2 and 3 meters) — so the sensor covers the approach area well. If you position it too low, the detection field will be reduced, and you might only trigger the light at the last second. Mounted high, the detection cone extends several feet in front of you, giving you time to walk under the light without being in the dark.
To go further on organizing an entire yard, our guide to wireless garden lighting by zone provides a complete, path-by-path approach.
Summary Table: What Lighting for Which Part of the Path?
| Zone | Recommended Solution | Intensity | Activation Mode |
|---|---|---|---|
| Along the path (marking) | Garden Bollards | Low to moderate | Dusk-to-dawn (auto) |
| Arrival / Entrance door | Lamp with motion sensor | High (800+ lumens) | Motion detection |
| Gate / Garage entrance | Solar floodlight with sensor | High | Motion detection |
| Dark corner (turn, step) | Bollard or recessed spot | Moderate | Dusk-to-dawn |
Common Mistakes in Home Pathway Lighting
Some classic pitfalls to avoid when planning home pathway lighting:
Putting all the power on the path and forgetting the arrival
The opposite of common sense. The path itself is rarely dangerous if you know it. It's at the arrival — when looking for your keys, getting out of a car — that you need real light. Prioritize the destination, not the journey.
Buying bollards without checking the IP rating
An IP44 bollard bought for exposed outdoor use on a path will suffer. After a few winters, water infiltrates, the LED oxidizes, and the bollard yellows or goes out. Minimum IP65 for anything outdoors without protection.
Underestimating the number of bollards
We often see pathways with a bollard every 16-20 feet (5-6 meters) — this is insufficient. The result is discontinuous marking, less legible, and visually less appealing. The 6.5-10 feet (2-3 meters) spacing is not an arbitrary recommendation: it's what guarantees a consistent luminous line.
Forgetting the solar panel orientation
A solar bollard planted in a shaded corner will never charge properly. Before choosing the final location for each bollard, observe the path's sun exposure throughout an entire day. Areas under trees or against a north-facing wall may be insufficiently exposed to ensure good autonomy.
What it Looks Like in Practice: An Installation Example
Imagine a 39-foot (12-meter) path between the gate and the front door, bordered by lawn on both sides. Here's how we'd organize it:
- 8 to 10 solar bollards on the sides of the path (approximately 6.5 feet / 2 meters spacing on each side), 20 inches (50 cm) high, dusk-to-dawn activation
- 1 solar lamp with motion sensor mounted 8 feet (2.5 meters) high on the facade, to the right of the front door, covering the arrival area for 26 feet (8 meters)
- Result: the path is marked from dusk, and as soon as you approach within 26 feet of the door, the bright light activates
Total installation: less than an hour. Labor cost: zero. Trenches: none. This is what well-chosen solar allows.
For those who want to compare all types of garden path lighting with detailed installation options, we have a dedicated article that also explores in-ground lights and stake spotlights.
Key Takeaways for Outdoor Path Lighting
Effective outdoor path lighting relies on two complementary principles: marking the path with regularly spaced bollards, and lighting the arrival with powerful, automatic light. These two functions are not interchangeable.
Today, solar is the most accessible solution for most homes — not because it's perfect, but because it avoids costly and destructive work while offering more than sufficient performance for daily use.
If you want a motion sensor lamp to secure your arrival, the page on solar motion detection lighting compares available options based on your specific needs. And if you want to go even further on choosing an autonomous outdoor lamp, all the details are there.
Lumic's SolarGlow, with its 1,200 lumens, dual 180° detection, and IP65 certification, is designed precisely for this role as an arrival lamp. 5-year warranty, 90-day satisfaction guarantee, rated 4.5/5 on Trustpilot from over 2,200 reviews.