
Cooking at night, chopping vegetables, and finding yourself working in your own shadow. The ceiling light illuminates the ceiling, not your countertop. It's a classic problem, and the solution isn't necessarily complicated—but it deserves a proper discussion.
This article focuses on one topic: LED kitchen countertop lighting. Not general lighting, not recessed spotlights. Just what you need to know to choose, place, and install LED strip lights under your upper cabinets to finally work in proper light.
Why Your Ceiling Light Isn't Enough for the Countertop
This is the first thing to understand, yet it's often overlooked. When you stand facing your countertop, your body casts a shadow over your work area. The ceiling light is behind or above you—it illuminates your back, not your cutting board.
The result: you might have a perfectly lit kitchen overall, but a nearly unusable countertop in the evening. It's frustrating because the cause is structural. It's not about the power of your ceiling light; it's about the direction of the light.
Why Shadows Are Inevitable Without Dedicated Lighting
Light comes from the ceiling, and you block that light as soon as you approach. Even with powerful, well-distributed spotlights, the problem persists as soon as you position yourself in front of the countertop. The only effective solution: a light source underneath your upper cabinets, directly illuminating the work surface from the front.
Do Under-Cabinet LEDs Really Change the Situation?
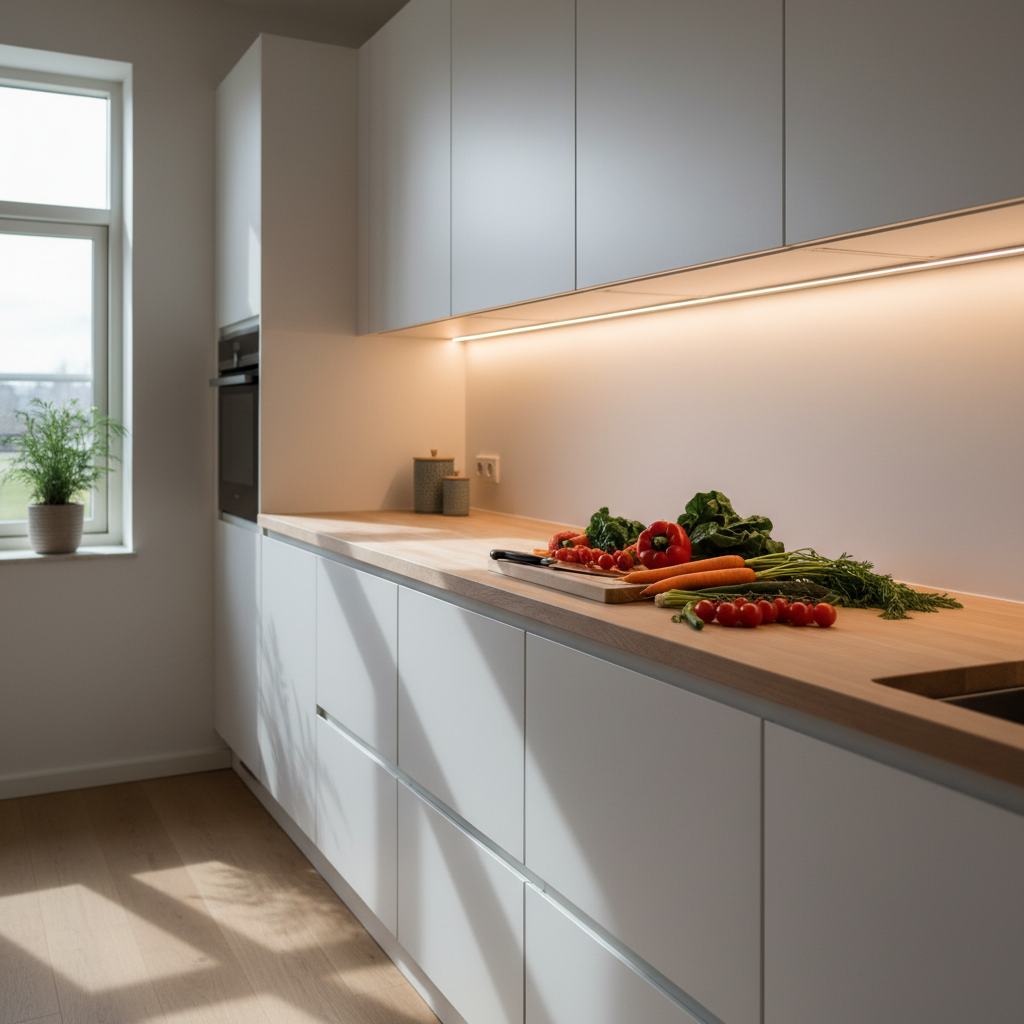
Yes, absolutely. An LED light bar fixed under an upper cabinet projects light downwards and forwards, right where you work. No more shadows, better visibility, and a much more pleasant visual experience. This is the principle of task lighting: the light source must be close to the task, not 8 feet above it.
What LED Brightness for a Kitchen Countertop?
For kitchen countertop lighting, it's generally recommended to have between 300 and 500 lumens per linear foot. Below that, it's insufficient for proper work. Above that, it starts to cause glare.
Specifically, if your countertop is 5 feet long, you're looking for a source that delivers between 1500 and 2500 lumens over that length. If your kitchen is very bright with many light surfaces (white tiles, glossy backsplash), the lower end of the range is sufficient. If you have a dark kitchen, gray or dark wood cabinets, aim for the higher end.
How to Calculate the Lumens You Need
Measure your countertop length in feet, multiply by 300 for the minimum, and by 500 for optimal comfort. A 3-foot kitchen countertop = between 900 and 1500 lumens. For 6 feet = between 1800 and 3000 lumens. If you use several light bars end-to-end, add their lumens.
What's the Difference Between 150 and 320 Lumens on an LED Light Bar?
A 9-inch (23 cm) light bar at 150 lumens is suitable for a small, targeted area: a coffee nook, the space under a range hood, a specific prep corner. A 16-inch (40 cm) light bar at 320 lumens covers a wider segment and is better suited for a standard countertop. In practice, for a countertop 4 to 6 feet long, two 16-inch light bars placed side-by-side offer homogeneous and sufficient coverage.
Color Temperature: Why 4000K for the Kitchen
This is probably the most underestimated criterion, yet it makes all the difference. Color temperature determines if your light is warm (orange, golden), neutral (white), or cool (bluish). It's measured in Kelvins (K).
For the kitchen, and the countertop in particular, 4000K is the benchmark. Here's why.
Why 4000K and Not 3000K for Cooking?
At 3000K (warm white), the light is pleasant for ambiance, but it alters colors. An undercooked chicken might appear golden and appetizing. An overripe strawberry might seem perfect. The true tones of food are distorted. At 4000K (neutral white), you see colors as they truly are. This is the temperature used in professional kitchens for this precise reason. You maintain sufficiently soft light without losing color accuracy.
What if I Want a Warmer Ambiance in the Evening?
The ideal solution is a light bar with adjustable color temperatures. In the evening, for ambiance, you switch to 3000K. When cooking, you switch to 4000K. Some current LED light bars offer this choice directly, without needing a different product. If you don't have this option, a compromise at 3500K is acceptable, but 4000K remains the best choice for the kitchen.
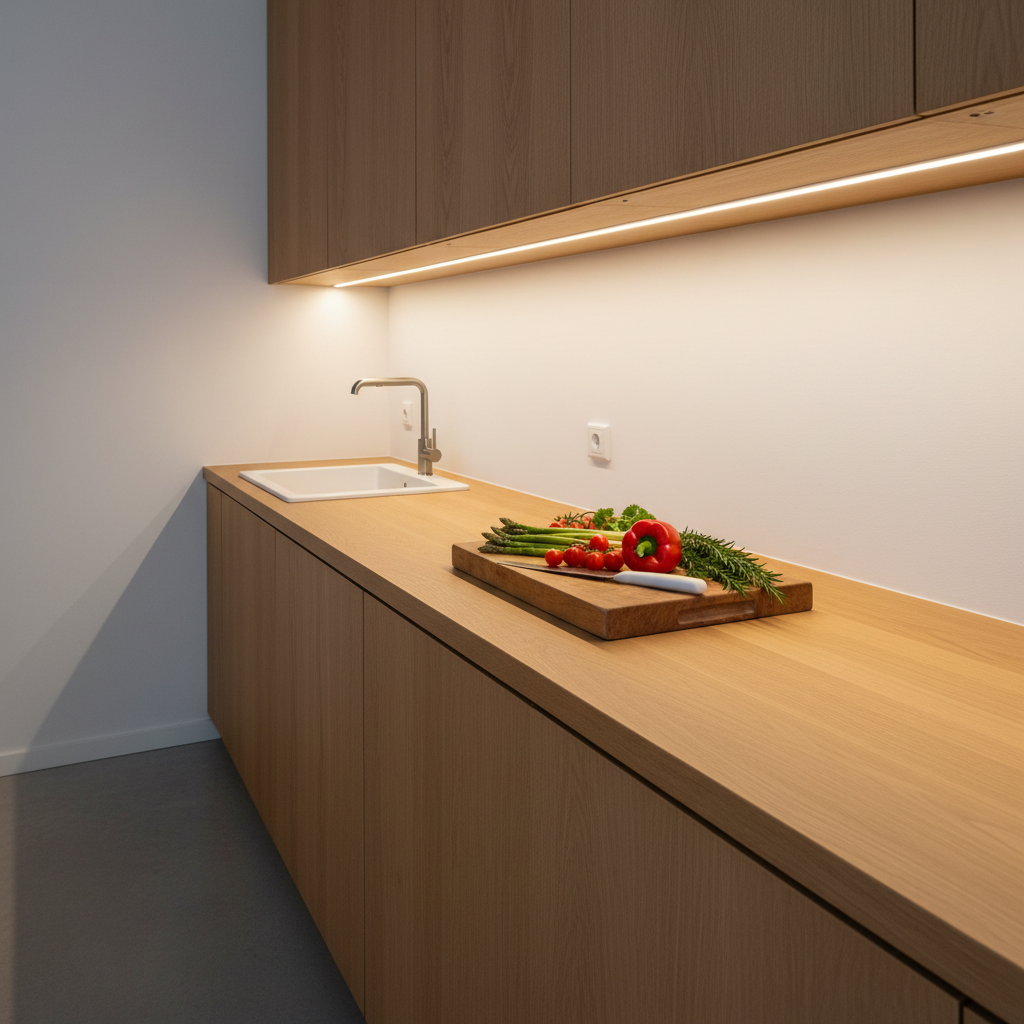
Where to Position an LED Light Bar Under an Upper Cabinet?
Placement is as important as brightness. A poorly positioned light bar, even a powerful one, will give disappointing results.
The basic rule: the light bar should be positioned in the front third of the upper cabinet, facing outwards, not at the back. If you install it too far back, the light illuminates the backsplash rather than the countertop. If it's on the very front edge, it can cause glare when you look up or create unpleasant reflections.
At What Height Under the Cabinet Should an LED Be Fixed?
The ideal positioning is approximately two-thirds of the cabinet's depth from the front. On a standard 14-inch (35 cm) deep cabinet, this corresponds to about 4-5 inches (10-12 cm) back from the front edge. This position allows for homogeneous countertop illumination without direct glare.
Can Placement Change Depending on the Kitchen Configuration?
Yes. If you have a very reflective or white-tiled backsplash, the light will bounce more, and you can position the light bar slightly further back. If you have an L-shaped or U-shaped kitchen, providing one light bar per segment is often better than a single long light bar, to avoid shadowed areas at the corners.
This is where repositionable magnetic mounting makes perfect sense: you can test different positions, see the results in real-world conditions, and adjust without hassle. Something impossible with a classic adhesive system or wired installation.
Wired or Wireless: What's the Real Difference?
This is often the real question when choosing. Here are the facts, without embellishment.
A wired under-cabinet installation requires either connecting to an existing circuit (which few people do safely themselves) or hiring an electrician. For a clean installation with hidden cables and a remote outlet, expect to pay easily between $150 and $300 for labor, depending on the configuration and region. The result is permanent and doesn't rely on a battery.
A rechargeable wireless battery-powered installation can be set up in less than a minute, with no tools, no electrician, and no drilling. The trade-off: it needs recharging. But if the battery life is sufficient (several weeks in motion detection mode), it becomes negligible.
Which Solution Should a Renter Choose?
Without hesitation: wireless. No holes in cabinets, no visible cables, no electrical modifications. At the end of the lease, you unhook your light bar and take it with you. To explore all available options, check out our article on wireless solutions for countertop lighting.
Does a Wireless Light Bar's Battery Really Last Long?
It depends heavily on the model. Entry-level light bars (often with small batteries) need recharging every week, which quickly becomes inconvenient. The difference lies in battery capacity. A 3000 mAh battery in motion detection mode (the light bar only turns on when you pass by) can last several weeks without recharging, depending on your kitchen's usage frequency. In continuous mode, battery life is logically much shorter.
For a detailed comparison between the two technologies, our article on the comparison between wireless and wired LED light bars covers all scenarios.
Motion Sensor: Useful or Gimmick?
For a kitchen countertop, a motion sensor is a truly useful feature. You walk into the kitchen, the light turns on. You leave, it turns off by itself. No need to touch a switch with flour-covered hands.
But there's an important nuance: good light bars combine two sensors. A motion sensor (someone passes by) AND an ambient light sensor. This second sensor ensures the light bar doesn't turn on in broad daylight when there's enough natural light. This prevents unnecessary battery waste, and that's when the advertised battery life becomes realistic in everyday use.
Can the Motion Sensor Be Disabled if Needed?
Most modern LED light bars offer a continuous mode in addition to motion detection mode. This is useful when you're cooking for a long time and not moving much—the sensor might turn off the light if you remain still for too long. Having both modes available in the same product is a selection criterion not to be overlooked.
Comparison Table: How to Choose Your LED Light Bar for Countertops
| Criterion | Entry-Level | Mid-Range | High-End |
|---|---|---|---|
| Lumens | 50-100 lm | 150-200 lm | 250-320+ lm |
| Color Temperatures | 1 only (often 6000K) | 2 options | 3 options (3000K / 4000K / 6000K) |
| Battery | Small (< 1000 mAh) | Medium (1500-2000 mAh) | Large (3000 mAh+) |
| Recharge | Micro-USB or batteries | USB-C | USB-C |
| Mounting | Simple adhesive | Adhesive + screws | Magnetic + industrial adhesive |
| Battery Life (motion detection) | < 1 week | 2-3 weeks | 4-6 weeks |
| Warranty | 6 months - 1 year | 1-2 years | 5 years |
This table illustrates why the price of an entry-level light bar might seem attractive, but compromises on battery and lumens significantly change the daily experience.
Which LED Light Bar to Choose for Your Countertop?
If you're looking for a no-installation, repositionable solution with the right color settings for the kitchen, the Movement 3.0 by Lumic checks the important boxes.
At 16 inches (40 cm), it delivers 320 lumens—sufficient for a standard countertop. It offers the three recommended temperatures, including 4000K for the kitchen, with adjustable brightness. Its 3000 mAh battery provides approximately 5 to 6 weeks of battery life in motion detection mode (16 inches)—meaning several fewer recharges per quarter compared to common models.
What truly sets it apart for under-cabinet kitchen installation is the magnetic mounting. The industrial adhesive backing sticks under the cabinet once and for all. The light bar magnetically attaches to it. You can detach it, move the backing, retest optimal placement—something a direct adhesive or wired installation doesn't allow. For a first try or a kitchen with a particular configuration, this flexibility is a game-changer.
5-year warranty, 90-day satisfaction guarantee, US-based customer support. Average rating 4.5/5 on over 2200 Trustpilot reviews.
To further your thinking on overall kitchen lighting, our complete guide to optimal kitchen lighting covers all levels: general lighting, task lighting, ambient lighting, and island lighting.
The Most Common Mistakes to Avoid
We see the same mistakes recurring, regardless of kitchen configuration. Here they are, so you don't make them.
Choosing Solely Based on Price
An $8 light bar with a tiny battery and a single temperature (often 6000K, icy white) will disappoint you. The light will be too cool for the kitchen, battery life insufficient, and you'll spend your time recharging or changing batteries. The real cost over two years of use is often higher than a more expensive but better-designed model.
Installing the Light Bar Too Far Back Under the Cabinet
This is the most frequent placement error. The result: the light illuminates the backsplash at the back rather than the countertop. The work area remains dim. The two-thirds forward rule applies to the vast majority of standard upper cabinets.
Using a Single Long Light Bar for the Entire Length
For a countertop 6 feet or longer, a single light bar creates less illuminated areas at the ends. Two medium-sized light bars, well-positioned, provide a more homogeneous result. The benefits of a wireless LED light bar include this modularity.
Ignoring Color Temperature
As we've seen, 6000K (very cool white) is the most common temperature on entry-level models—and the least suitable for the kitchen. Checking this criterion before buying avoids an unpleasant surprise when you turn it on.
Sticking Directly Without Testing the Position
Before permanently fixing your light bar, test it by hand in different positions under the cabinet. Illuminate your countertop from the front, back, and center. Note which position gives the best result. Then fix it. A magnetic system even allows you to retest after installation, which a direct adhesive does not.
Summary: Key Takeaways for Smart Choices
LED kitchen countertop lighting addresses a simple but often poorly solved need: illuminating the space where you actually work, not the ceiling above you.
The four essential points to remember:
- 300 to 500 lumens per linear foot: this is the minimum brightness for proper work.
- 4000K: the neutral temperature that reveals the true colors of food. Not 3000K (too warm for work), not 6000K (too cool for home).
- Position in the front two-thirds of the upper cabinet, not at the back.
- Magnetic mounting if you want to adjust your placement after installation—essential for finding the optimal position.
If you want to compare all available options before deciding, consult our article to choose the right LED light bar for your kitchen, which covers all technical and budget criteria.